Recommended Articles
Knock your sauce off and save energy

Vegans of Ottawa – Gabrielle Lizée-Prynne

Four Must Buys this Labor Day Holiday Weekend
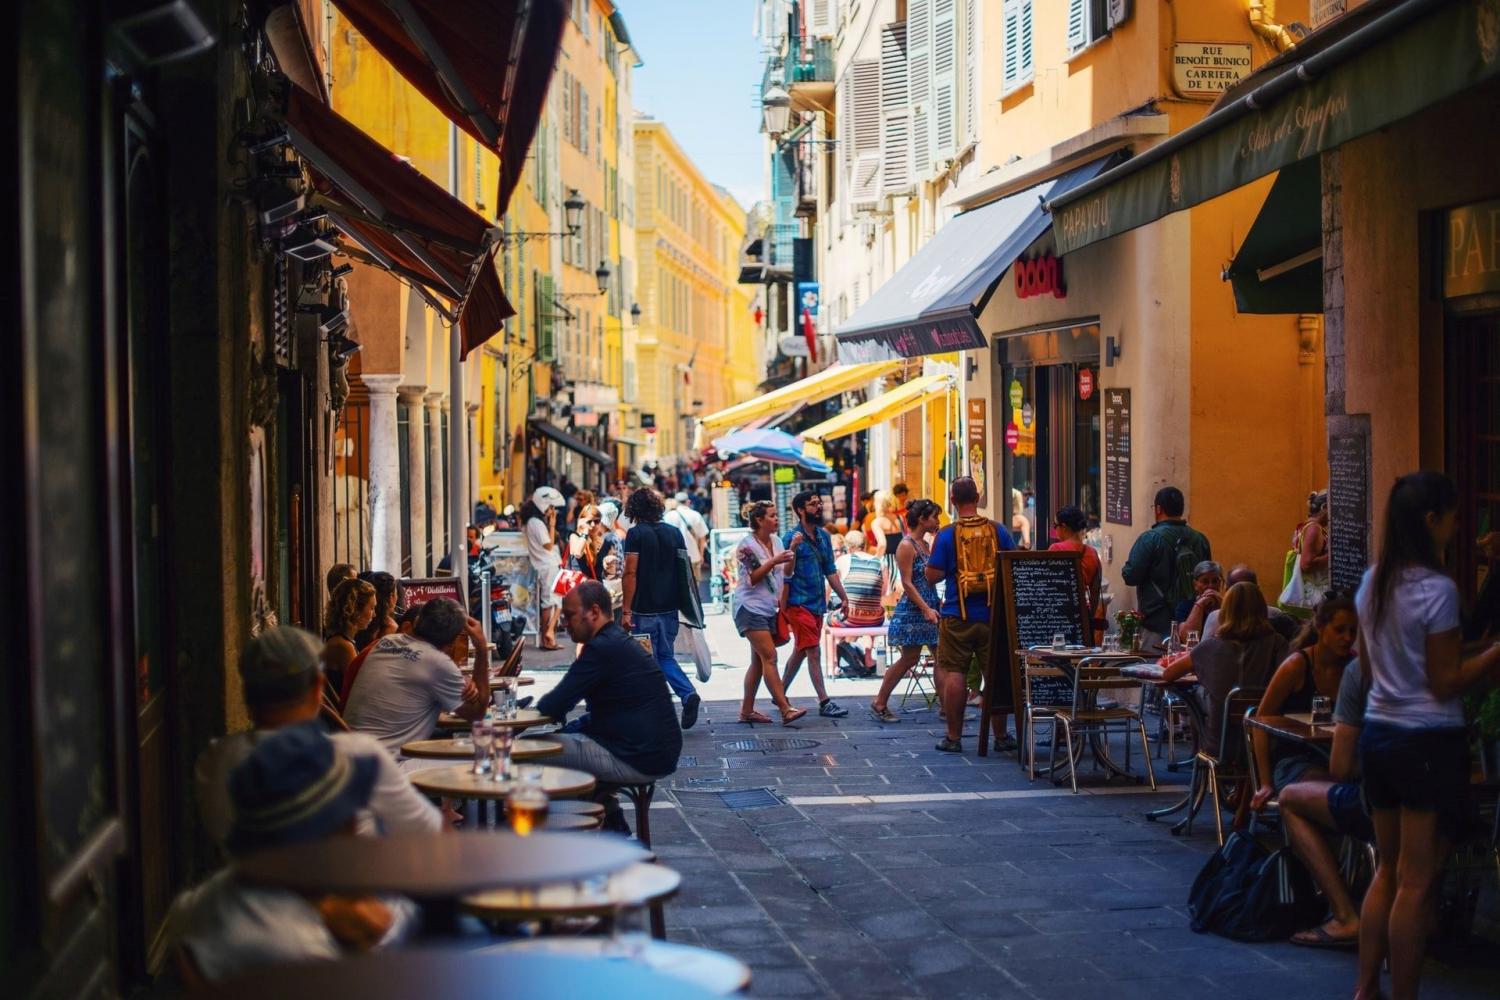
For all us who would prefer to be meandering through the winding streets of some far away city, popping in and out of shops, stopping for a coffee or visiting a magnificent art collection but are instead stuck at home, we bring you recipes from France. Create these delicious treats in your own kitchen and let them transport you to your favourite corner of France!
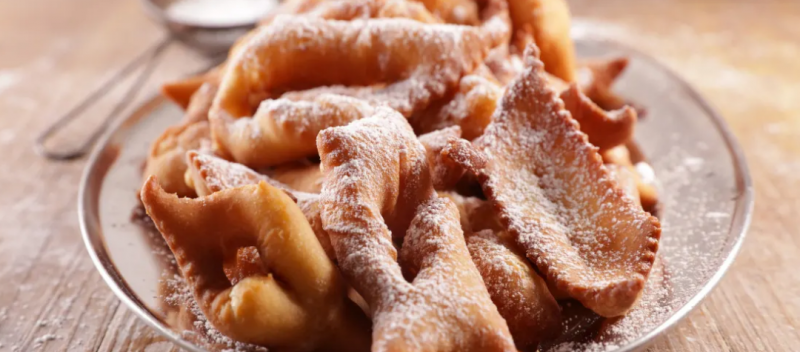
All regions and families in France have a recipe for bugnes, each with its own name: ‘Merveilles’ in Bordeaux, ‘Pets de Nonnes’ in Champagne, ‘Bottereaux’ in Nantes and Brittany and ‘Frappe’ in Corsica. Around Lyon and in Auvergne, the local bugnes herald the annual Carnival – but there’s nothing to stop you making and eating them all year round! Try this recipe by Anne-Sophie Vidal, winner of TV show Le Meilleur Pâtissier. They can be crunchy or, if you add yeast, fluffy — is up to you.
Ingredients for around 40 crunchy or 25 soft bugnes
Instructions:
In a bowl, form a well in the flour (and baking powder if you’re making fluffy bugnes). Add the beaten eggs and mix vigorously, then add the rest of the ingredients and mix. Knead the dough well by hand, then wrap it in cling film and let it rest for a few hours (if this rest exceeds six hours, put the dough in the fridge and remove it 10 minutes before using). If you’re making fluffy bugnes, use a large airtight box instead of cling film, as the dough will rise a little.
For crunchy bugnes: On a floured board, using a rolling pin, roll out the dough very thinly to 2mm. Don’t hesitate to use plenty of flour as the dough can be very sticky. Cut out rectangles of dough (roughly 4cm x 8cm) with a wheel or pizza cutter. Make two lines in each rectangle.
For fluffy bugnes: On a floured board, using a rolling pin, roll out the dough to 5-6mm. Don’t hesitate to add flour as the dough can be very sticky. Cut fairly narrow diamonds of dough (roughly 4cm x 12cm diagonally) with a wheel or pizza cutter. Make one line lengthwise in the centre of each diamond.
Heat some frying oil in a deep pan. When it’s hot enough (test by dropping a small piece of dough into it; it should form bubbles and quickly float to the surface), brown the bugnes in batches of five (depending on the size of your pan) for around two minutes, turning them over after one. They should be barely browned for crunchy and golden for fluffy.
Drain them on paper towels. After allowing them to cool for 15 minutes, dust with icing sugar on both sides (essential). Enjoy them lukewarm or cold with tea or coffee.
Both types of bugnes keep for at least a week in an airtight container.
Text by Pascale Filliâtre Photo by M.Studio
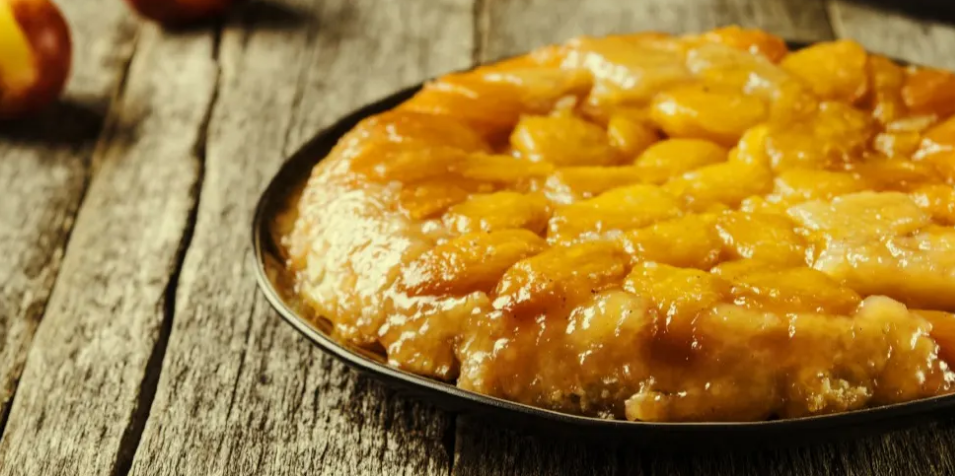
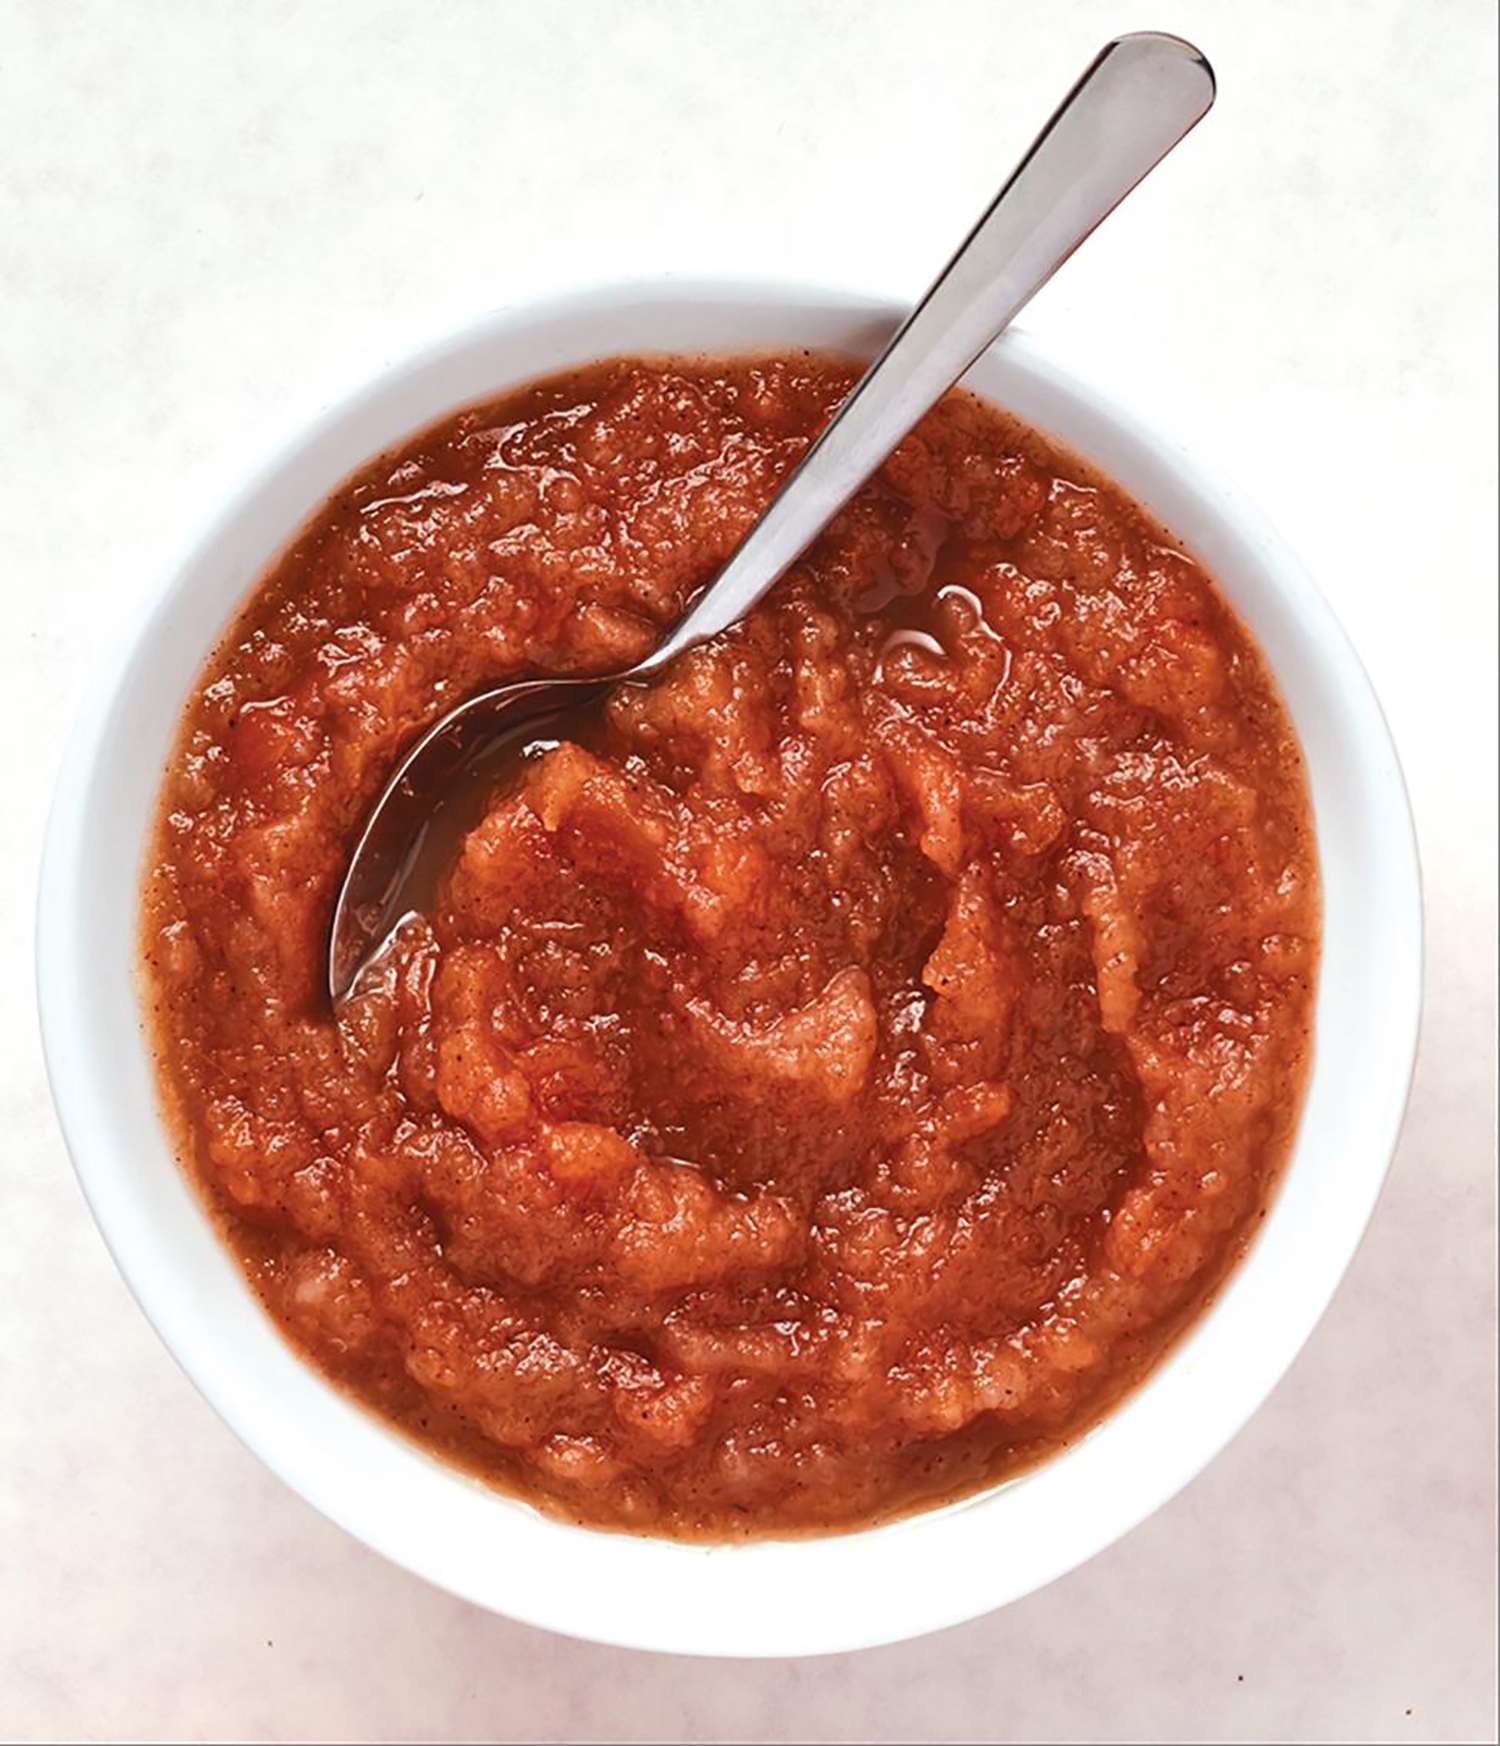
Here's another classic French dessert. What seemed to be an inattentiveness on the part of the Tatin sisters allowed the ingenious discovery of one of the most delicious desserts. This hundred-year-old apple tart recipe from the Loire Valley is simple to make, just don’t forget to turn it upside-down before serving it!
Ingredients
For the pastry:
For the caramel:
Instructions
Photo of Tarte Tatin by Trendyrowdy
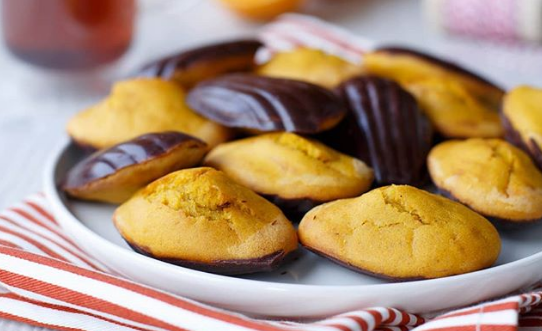
All children love these humpbacked shell-shaped cakes from Lorraine that were adored by Marcel Proust, France’s great national writer. The classic recipe is unbeatable and is open to variation. Here is a version by Julie, a dynamic influencer at Takethepower and Cuisine Ta Ligne, using orange, pumpkin and chocolate?
Ingredients for 36 madeleines
Instrucitons
For the chocolate shells:
Text by Pascale Filliâtre , Recipe and photo by Takethepower_July
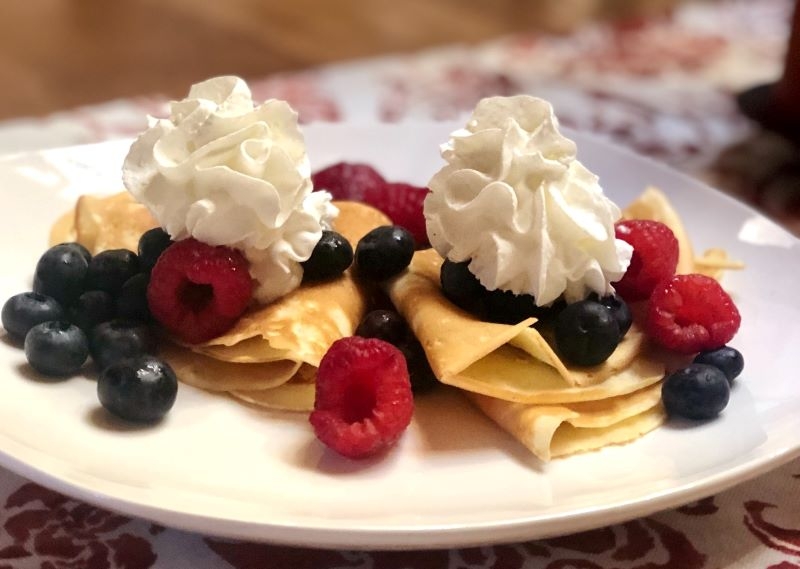
Whether sweet or savoury, the Breton pancake is always appreciated by all. Emblematic speciality of Brittany, the pancake can be eaten at any time. Made with wheat or buckwheat, it has crossed history and continents. This top Brittany delicacy goes perfectly with any sides — jazz them up with fruit and some fresh whipped cream or simply slather them with Nutela and enjoy!
Ingredients
Instructions
Recipe courtesy Ricardo.com Photo: Stephanie Klepacki, Unsplash
If you are looking to learn from the pros, watch this video showing how to make crêpes with tips from a master from the School of Master Crêpe Makers in Rennes.
Header photo of Nice by Paul Rysz, Unsplash